
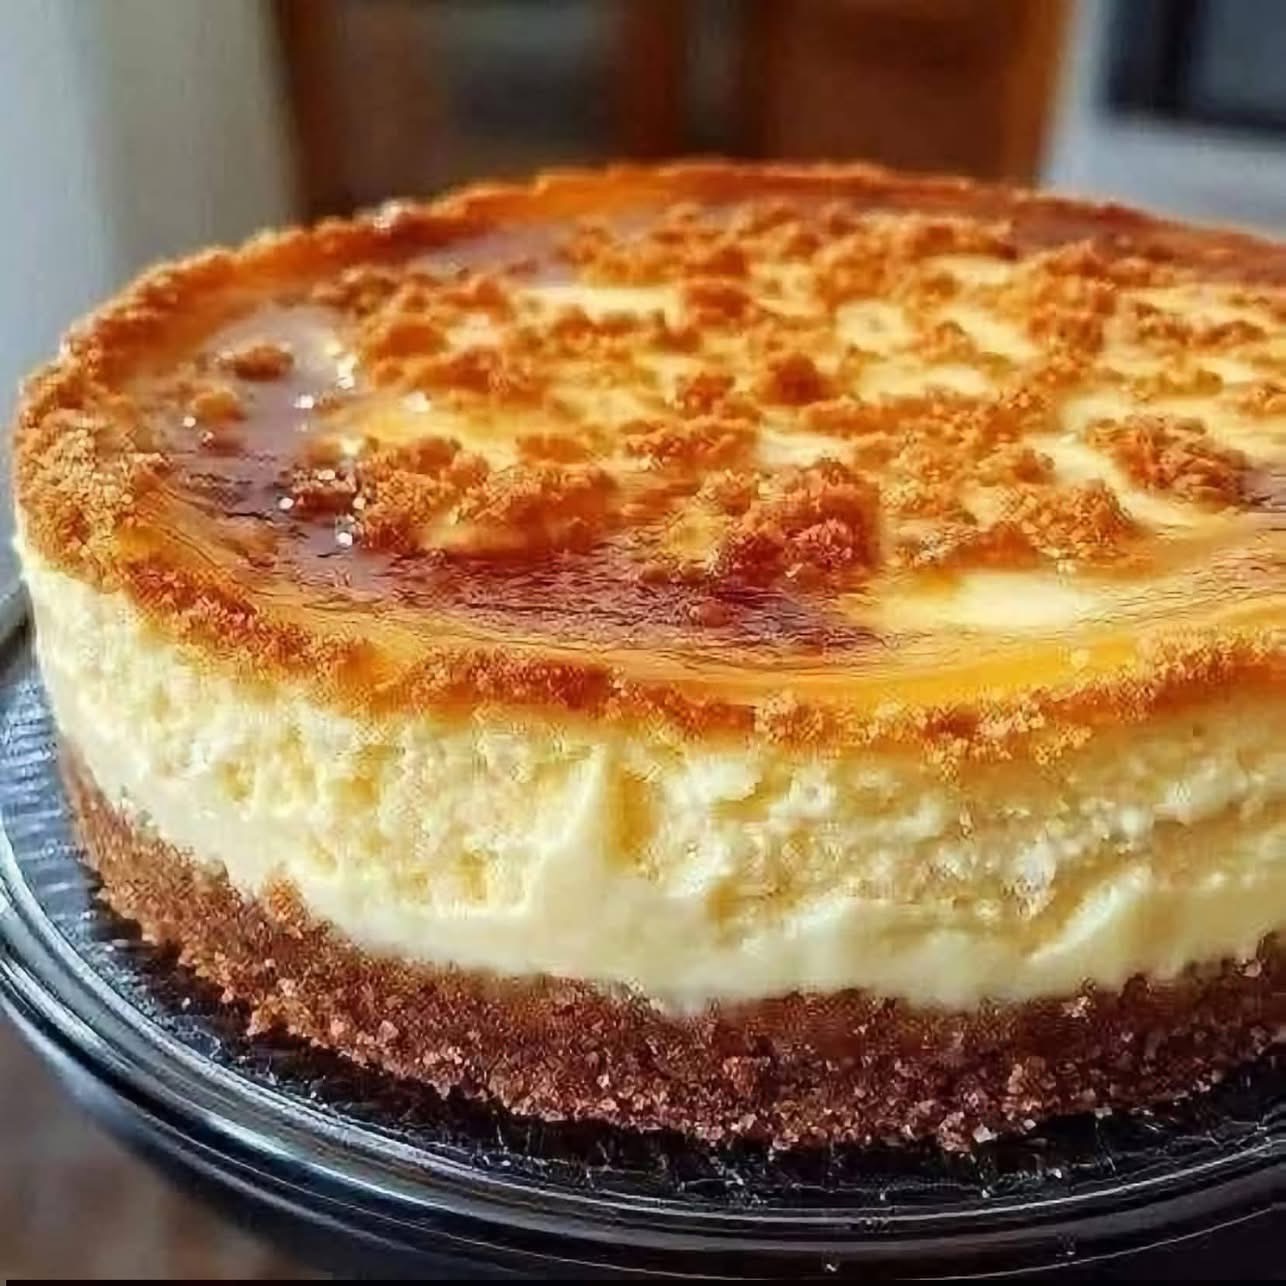
Creamy, indulgent, and packed with the unmistakable caramelized flavor of Lotus Biscoff cookies, this Lotus Biscoff Cheesecake is an easy no-bake dessert that looks impressive with minimal effort. It features a buttery Biscoff cookie crust, a rich and silky cream cheese filling, a smooth layer of melted cookie butter, and a generous topping of crushed Biscoff cookies.
Whether you’re looking for an easy dessert recipe, a make-ahead treat for guests, or a show-stopping cheesecake for a special occasion, this recipe is a delicious choice.
Recipe Overview
| Details | Information |
| Prep Time | 25 minutes |
| Chilling Time | 6–8 hours |
| Total Time | About 6 hours 25 minutes |
| Servings | 10–12 slices |
| Difficulty | Easy |
| Course | Dessert |
| Cuisine | European-inspired |
| Method | No-Bake |
| Main Flavor | Biscoff & Caramel |
| Best For | Parties, holidays, birthdays, family gatherings |
Why You’ll Love This Recipe
- 🍪 Biscoff lovers will adore it: Every layer delivers that caramelized cookie flavor.
- 🧀 Ultra-creamy filling: Full-fat cream cheese and whipped cream create a rich, smooth texture.
- 🤎 No-bake cheesecake: No oven is required, making this an easy homemade dessert.
- ✨ Beautiful presentation: The glossy cookie butter topping and crushed cookies make it look bakery-worthy.
- ⏰ Perfect make-ahead dessert: It needs several hours to chill, so it’s ideal for preparing the day before.
- 🎉 Great for entertaining: This cheesecake makes an impressive dessert for dinner parties and celebrations.
Ingredients
For the Biscoff Cookie Crust
| Ingredient | Amount |
| Biscoff cookies | 200 g |
| Unsalted butter, melted | 60 g |
For the Creamy Biscoff Filling
| Ingredient | Amount |
| Full-fat cream cheese, room temperature | 600 g |
| Biscoff cookie butter spread | 150 g |
| Powdered sugar | 100 g |
| Heavy/double cream, chilled | 200 ml |
For the Topping
| Ingredient | Amount |
| Biscoff cookie butter spread | 150 g |
| Biscoff cookies, coarsely crushed | 3–4 cookies |
Ingredient Notes
Biscoff cookies: Crush them very finely for the crust so it holds together firmly.
Butter: Use unsalted butter and melt it gently. Allow it to cool slightly before mixing with the cookies.
Cream cheese: Full-fat cream cheese is strongly recommended. Reduced-fat varieties can produce a softer filling.
Biscoff spread: Smooth Biscoff cookie butter works best for both the filling and topping.
Heavy/double cream: Keep the cream cold until you’re ready to whip it. Cold cream produces better volume and helps create a stable cheesecake filling.
Powdered sugar: This dissolves more easily than granulated sugar and keeps the filling smooth.
Step-by-Step Instructions
Step 1: Prepare the Cheesecake Pan
Line the bottom of a 20 cm (8-inch) springform pan with parchment paper.
If desired, lightly grease the sides or use a strip of parchment around the inside edge. This makes removing the finished cheesecake easier.
Step 2: Make the Biscoff Crust
Place the 200 g of Biscoff cookies into a food processor and pulse until they become fine crumbs.
Pour in the melted butter and pulse until the mixture resembles wet sand.
No food processor?
Place the cookies in a sealed food bag and crush them with a rolling pin until finely ground. Mix the crumbs and melted butter in a bowl.
Step 3: Press the Crust
Transfer the cookie mixture into the prepared springform pan.
Firmly press the crumbs into an even layer using the bottom of a glass, measuring cup, or the back of a spoon.
Pay particular attention to the edges so the crust doesn’t crumble when sliced.
Place the crust in the refrigerator for 20–30 minutes while preparing the filling.
Step 4: Prepare the Cream Cheese Mixture
Place the room-temperature cream cheese in a large mixing bowl.
Beat until smooth and creamy.
Add:
- 150 g Biscoff cookie butter
- 100 g powdered sugar
Mix until completely combined and smooth.
Avoid overmixing once everything is incorporated.
Step 5: Whip the Cream
Pour the chilled 200 ml heavy/double cream into a separate bowl.
Whip until it reaches medium-to-stiff peaks.
The cream should hold its shape without becoming grainy.
Step 6: Combine the Filling
Gently fold the whipped cream into the Biscoff cream cheese mixture in two or three additions.
Use a spatula and fold gently rather than aggressively mixing. This helps maintain the light, creamy texture.
Step 7: Fill the Cheesecake
Remove the chilled crust from the refrigerator.
Spoon the Biscoff filling over the crust and spread it evenly.
Smooth the surface with a spatula or the back of a spoon.
Gently tap the pan against the counter once or twice to remove any large air pockets.
Step 8: Chill
Cover the cheesecake and refrigerate for at least 6 hours, preferably overnight.
This is an important step. The cheesecake needs enough time to firm up and become easy to slice.
Step 9: Prepare the Biscoff Glaze
Place 150 g Biscoff cookie butter in a microwave-safe bowl.
Heat in short 10–15 second intervals, stirring between each interval, until smooth and pourable.
Do not overheat it.
Allow the melted cookie butter to cool for a few minutes so it is warm and fluid rather than hot.
Step 10: Add the Topping
Pour the melted cookie butter over the chilled cheesecake.
Gently spread it toward the edges with a spatula.
For the best appearance, allow some of the cookie butter to naturally approach the edge without completely covering the sides.
Step 11: Add the Crushed Cookies
Immediately sprinkle the coarsely crushed Biscoff cookies over the cookie butter layer.
Return the cheesecake to the refrigerator for approximately 20–30 minutes to allow the topping to set slightly.
Step 12: Slice and Serve
Carefully remove the cheesecake from the springform pan.
For clean slices, dip a sharp knife into hot water, wipe it dry, and slice.
Clean and rewarm the knife between cuts for neat, professional-looking slices.
Best Tips for a Perfect Biscoff Cheesecake
1. Use full-fat cream cheese
Full-fat cream cheese gives the filling a richer flavor and firmer texture.
2. Keep the cream cold
Cold heavy cream whips more successfully and gives the cheesecake a lighter texture.
3. Don’t rush the chilling time
For the best results, refrigerate the cheesecake overnight.
4. Don’t pour hot cookie butter onto the cheesecake
If the cookie butter is too hot, it can soften the filling. Let it cool slightly before spreading.
5. Crush the crust very finely
Large pieces of cookie can make the crust unstable and difficult to cut.
6. Press the crust firmly
A firmly packed crust gives every slice a strong, clean base.
7. Use a springform pan
A springform pan makes it much easier to remove a chilled cheesecake without damaging the sides.
Best Ingredient Options
| Ingredient | Best Option |
| Cream cheese | Full-fat block-style cream cheese |
| Cookies | Lotus Biscoff caramelized biscuits |
| Cookie butter | Smooth Biscoff spread |
| Cream | Heavy cream or double cream |
| Butter | Unsalted butter |
| Sugar | Powdered/icing sugar |
For a richer homemade dessert, avoid replacing full-fat cream cheese with very soft spreadable varieties if possible.
Recipe Variations
Chocolate Biscoff Cheesecake
Add 100 g melted and cooled chocolate to the filling for a chocolate-and-Biscoff combination.
Biscoff Caramel Cheesecake
Drizzle caramel sauce over individual slices before serving.
Mini Biscoff Cheesecakes
Make the recipe in a muffin tin lined with cupcake cases. Use smaller portions of crust and filling, then chill until firm.
Biscoff Cheesecake Cups
Layer cookie crumbs, cheesecake filling, cookie butter, and crushed cookies in small dessert glasses for an easy individual dessert.
Chocolate Cookie Crust
Replace part of the Biscoff cookies with chocolate sandwich cookies for a chocolate-Biscoff flavor combination.
Extra-Creamy Biscoff Cheesecake
For an even more luxurious dessert, serve each slice with a small spoonful of whipped cream.
What to Serve With Biscoff Cheesecake
This cheesecake is rich, so simple accompaniments work especially well:
- ☕ Coffee
- 🫖 Black tea
- 🥛 Cold milk
- 🍓 Fresh strawberries
- 🫐 Fresh berries
- 🍦 Vanilla ice cream
- 🍯 Caramel sauce
- 🍫 Chocolate sauce
- ☁️ Lightly whipped cream
A cup of coffee or espresso is particularly good with the caramelized Biscoff flavor.
Make-Ahead Instructions
This is an excellent make-ahead dessert recipe.
1 Day Ahead
Prepare the entire cheesecake, including the topping, and refrigerate overnight.
Up to 2 Days Ahead
The cheesecake can generally be prepared ahead and kept covered in the refrigerator for up to 3 days for the best quality.
For the freshest cookie topping, you can prepare the cheesecake and add the crushed cookies closer to serving.
Storage
Keep the cheesecake covered in the refrigerator.
Refrigerator: Store for up to 3 days for the best texture and flavor.
Because this cheesecake contains cream cheese and dairy cream, it should remain refrigerated and should not be left at room temperature for extended periods.
Reheating
This is a no-bake cheesecake, so reheating is not recommended.
Serve it chilled directly from the refrigerator.
If the cheesecake is extremely cold and you prefer a slightly softer texture, allow an individual slice to sit at room temperature for approximately 10–15 minutes before serving.
Freezing
You can freeze the cheesecake without the fresh crushed-cookie topping for better texture.
- Chill the cheesecake completely.
- Wrap it tightly in plastic wrap.
- Add a second layer of aluminum foil or place it in an airtight freezer container.
- Freeze for up to 1 month for best quality.
- Thaw overnight in the refrigerator.
Add fresh crushed Biscoff cookies after thawing for the best crunch.
Common Mistakes to Avoid
❌ Using warm cream cheese
Very warm or overly soft cream cheese can make the filling too loose.
❌ Not whipping the cream properly
Under-whipped cream can result in a soft cheesecake that doesn’t hold its shape.
❌ Overheating the cookie butter
High heat can make cookie butter oily or difficult to work with.
❌ Cutting the cheesecake too soon
The filling needs sufficient refrigeration time to set.
❌ Using too much butter in the crust
Too much butter can make the crust greasy and difficult to cut.
❌ Not pressing the crust firmly
A loose crust may crumble when you lift a slice.
Nutrition Estimate
Approximate values per serving, based on 12 servings. Actual nutrition will vary depending on the specific brands and portion sizes used.
| Nutrient | Estimated Amount |
| Calories | 480–520 kcal |
| Protein | 6–8 g |
| Carbohydrates | 45–50 g |
| Fat | 30–34 g |
| Saturated Fat | 17–20 g |
| Sugar | 28–32 g |
| Fiber | 1–2 g |
| Sodium | 300–400 mg |
Frequently Asked Questions
Can I make this Biscoff cheesecake without an oven?
Yes. This is a no-bake Biscoff cheesecake, so the filling sets in the refrigerator rather than the oven.
How long does Biscoff cheesecake need to set?
For the best result, refrigerate it for at least 6 hours. Overnight is even better.
Why is my cheesecake too soft?
The most common reasons are insufficient chilling, cream that wasn’t whipped enough, or using a cream cheese with a softer consistency.
Can I use another cookie instead of Biscoff?
Yes. However, using Biscoff cookies gives the recipe its signature caramelized flavor.
Can I use crunchy Biscoff spread?
Yes, although smooth cookie butter creates a more uniform filling and smoother topping.
Can I make this cheesecake the day before?
Absolutely. In fact, making it the night before is one of the best ways to get a firm, easy-to-slice cheesecake.
Can I freeze Biscoff cheesecake?
Yes. Freeze it well wrapped and thaw it slowly in the refrigerator. For the best texture, add the crushed-cookie topping after thawing.
What size pan should I use?
A 20 cm (8-inch) springform pan works well for this quantity and produces a beautifully thick cheesecake.
How do I get clean cheesecake slices?
Use a sharp knife warmed in hot water. Wipe it dry before each cut and repeat between slices.
Can I make individual Biscoff cheesecakes?
Yes. Divide the crust and filling between small dessert glasses, jars, or muffin cases and refrigerate until firm.
Final Thoughts
This Lotus Biscoff Cheesecake is the perfect combination of crunchy caramelized cookies, rich cream cheese, smooth cookie butter, and a luxurious creamy texture. The recipe requires no baking and uses simple ingredients, making it an approachable option for both beginner bakers and experienced home cooks.
For the ultimate result, don’t rush the chilling process. Let the cheesecake set overnight, add the glossy Biscoff topping, finish with plenty of crushed cookies, and serve it cold with coffee or tea.
If you’re searching for an easy no-bake dessert, homemade cheesecake recipe, party dessert, holiday dessert, or make-ahead dessert, this Biscoff cheesecake deserves a place on your table.